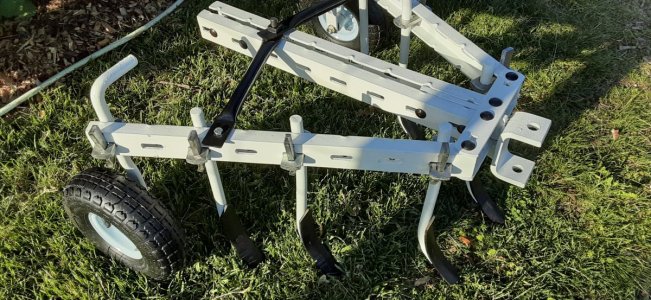
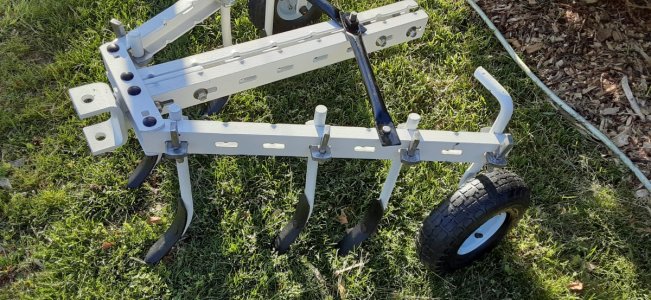
What are you currently working on??

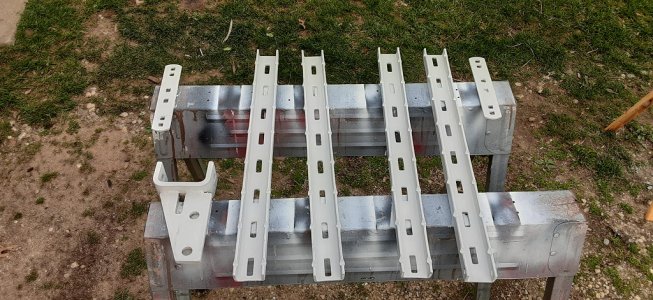
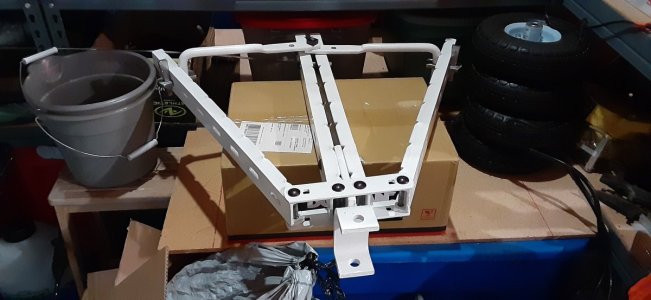
I just got all of the long straight sections and hitch cleaned up.

Found out why this didn't rust so bad over the years, it's heavily coated with lead based paint. Had to setup the air compressor, grind in only one direction and trap all of the white powered lead paint into a collector. Else, it would of been super easy with the power washer to strip it all.
It's everything on the black cart in the photo.

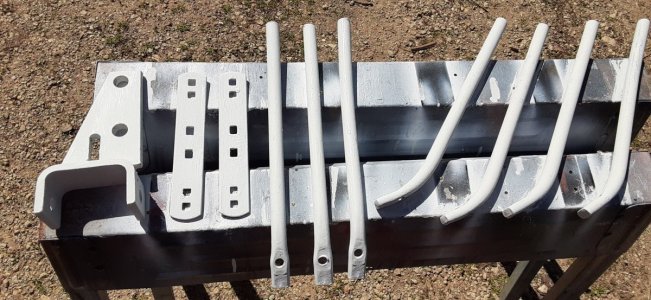
The difficult part is stripping the round shaft like parts from the paint. All the parts in the box.

I'll do 2-coats of primer and then a nice finish coat of the Club Cadet white it once had without the lead.

The carriage bolts I'll price at Menards or the H-D. Too pricey at ACE.

I like the original square nut on the back top. It came off easy after a soak in Deep Creep. Finding an exact replacement will be a chore.
Some progress before all of the rain came.

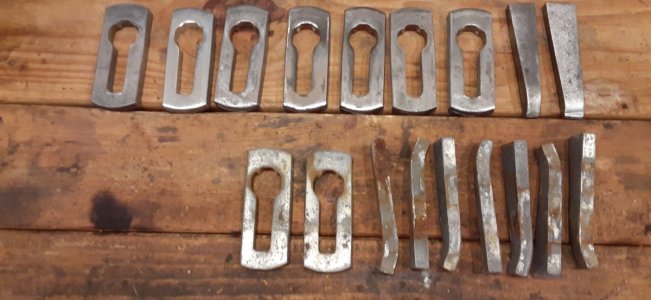
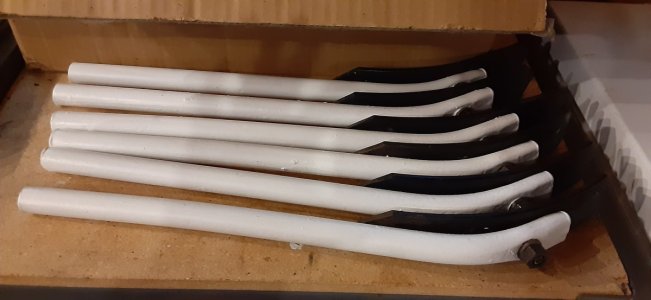
A bit of sanding and cleaning. Nothing like 40+ years of tarnish and grime. 4 on the right are the best I could do.
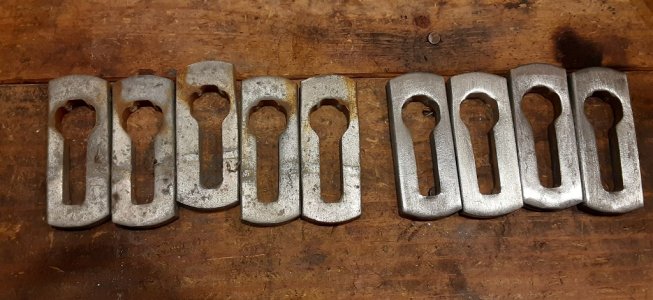
20240501_190621 - Copy.jpg

Cleaned a bit, and painted some.
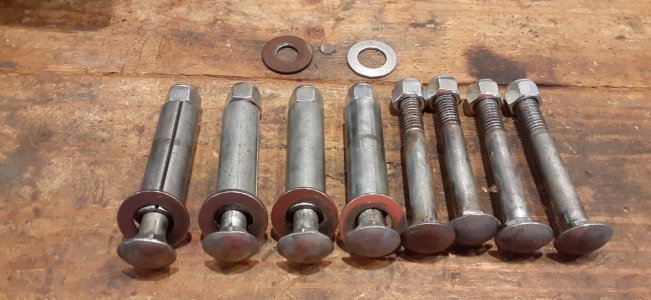
20240501_190636 - Copy.jpg
 
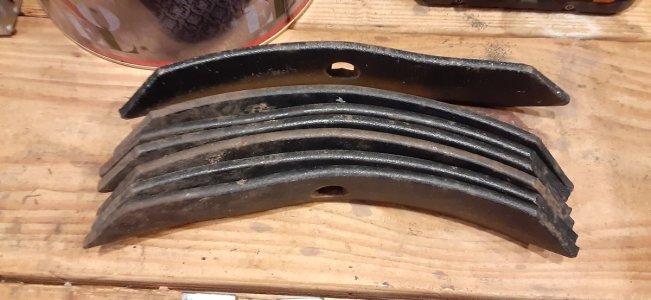
I may leave the rippers alone. They are creased spring steel. I can't reshape these without an immense amount of heat and anvil working.
The one ripper being wavy was the middle spare. Optionally used on the Brinly chisel plow. The paint is heat treated. Just wash them up in simple green and dry.

20240511_120642.jpg
 
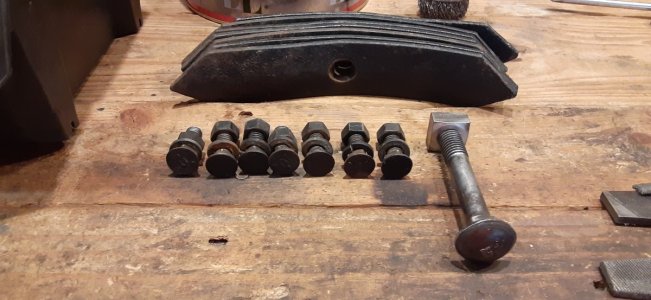
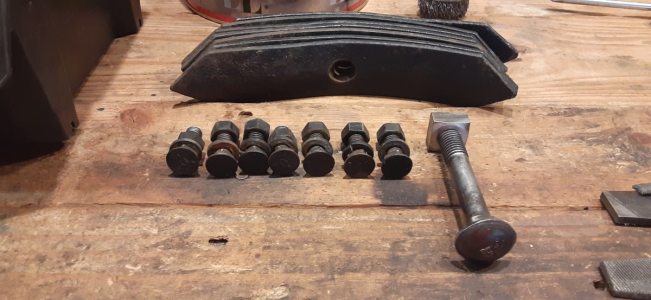
Recall how NASTY those bolts were and fasteners. Lots of cleanup too. I couldn't restore the washers. I have a bunch of stainless to replace them.
Also the nuts were in very bad shape. I swapped them with ny-locks.

20240511_141437.jpg

The square nut cleaned up remarkably well.

20240511_141725.jpg
 
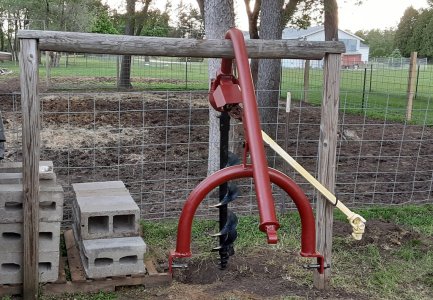
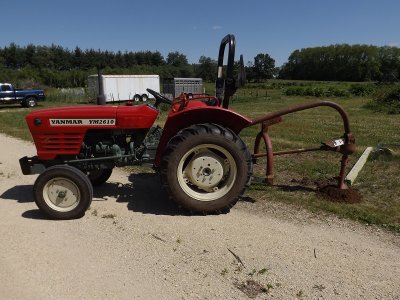
At the same time, with some help, restored the CAT-1 / CAT-2 PHD. Will be placing this to sell shortly.
The ITG company made it years ago. And it was also re-badged as a Bush Hog model too. This works up to 60Hp tractors.

What sets this model apart from a majority out there is the gearbox head with the Gleason Coniflex gears. It's the reason why 24Hp up to 60Hp tractors can run with it.

20240512_183016.jpg
 
Last edited:
I put new rotor and pads on F 150 yesterday. at 78, I sure do handle those big tires like I used to.
I did that on my old crusty 96 Dakota the day before. Not figuring on having that one much longer/ but had to, because Im keeping it past "tomorrow" for sure.....
While up in the air, I saw the wires going to the starter were crispy and had some green showing so I replaced those while I was there. As easy as they snapped off (like twigs especially the "big" wire) I'm really surprised at how that truck has never "not" started for me ....
Though at roughly 2/3 of your age (56) and my upper right arm never "not" hurting anymore I'm wondering how long I can continue to do this kind of work which I still do daily for a living

Last night I did something I haven't done in a good while, I was crashed out cold on the couch by 8:30...
 
Sprayed my yard with a mix of 2,4d /the last of my diazinon (have to keep eye out at garage sales for more, can't get anymore) some quinchlorac for the crabgrass that's already showing up (about w month early for that crap)
I used the backpack sprayer, took a while to get the walk speed, spray wand waving speed and pumping speed in sync
Was gonna use the hose end sprayer (I went under the house and turned on the outside water just for the purpose) then couldn't find the hose end sprayer which I found staring me in the face about halfway through the spray job

Then I dropped the wife off to meet up with friends for lunch at a place I hate (olive garden)
I came home and found out I have no cans of freon left so I went back to town and bought some , came back and charged up the AC in the Durango. Daughter in law brought her home
I was gone "testing out the AC" when she got home
Then we went to the monster in laws to check on the yard to see if it needed mowed, made that 60 mile trip more worth it by spraying more 2,4d and took the hand carry pump up sprayer loaded with brush killer and soaked the fence line and around her outside ac unit

Came home and put a lawn boy self propelled model back together, I broke down and wound up buying a new coil for it,
I was gonna scrap the motor as the local place wanted $50 for a coil... For a quantum engine yikes.
But that plan was scrubbed because every potential engine I had here that would bolt to the lawn boy and had the right length crank has a 7/8 shaft, the quantum I had on there had a fatter crank/ so the blade adapter wouldn't work on anything in my stash besides "that" engine. I've never seen anything but a 7/8 shaft on a push mower before. I found an nos OEM coil on fleabay for $30 shipped. OEM Briggs but made of chinesium... The times were in, don't cease to amaze me there /and piss me off at the same time
No cicadas here yet but as I got closer to the monster in law's, I started hearing them. Her one and only tree she has left (she had a tornado go thru about 10 years ago and did in the rest) had solid cicadas on the ground, a ring around the trunk of the tree probably a solid foot wide I should have gotten a pic
Since 2020 till now, I've road side picked up push mowers of at least a dozen. Fixed some to run, sold or gave away. Others, tore down for just the parts. I have 4 good B+S coils and carbs for the same engine series now. :cool: No need for flea-bay nor amazon-get-conned chin-na crap.

Just keep your eyes peeled. Some millennial would leave a push mower in the rain, it will not start, and put it to the curb. :p You then got a machine with simple surface rust on the magnets of the fly wheel head and coil. Clean with lite oil and wet fine sandpaper stroking with the metal grain. Tada, fixed and good as new!
Check my old post Brett over on GTtalk. I’m still using this mower and it serves me well.
 
Check my old post Brett over on GTtalk. I’m still using this mower and it serves me well.
If it wasn't down pouring to get out to the lean-to with the mowers and tractor, I would of snapped a few shots of the 'improved' Lawn Boy.

Instead, I got all of the chisel rippers put back on the vertical rods. Assembled the hitch, 4 frame bars and set the V position. The only thing left is to place the brackets on, align each vertical rod and height, then pound in the locking spikes.
 
Last edited:
I have 4X H-F wheels. Yet, no mounting rods nor the locking brackets with spikes. I have no CNC nor lathe to make then.
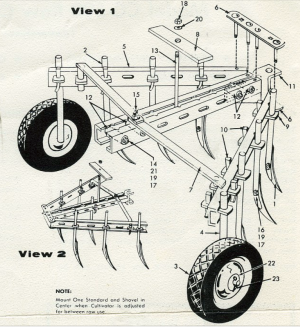
Looking at the top V-bars, I can see how easy it would be to use them to mount the wheels. I could use them for the wheels, and make the top V-bars as regular flat bars to simply bolt on. Sadly, this would not be OE Brinly, but a band-aid. I like to do 100% full restores. Even fabricate what was missing. Glad the members here provided some manuals and images too.

20240524_181939.jpg

The acetone worked extremely well. Super clean and the faded color is at least 2X better than before. :cool:

20240524_181948.jpg

This chisel plow came in a few colors. I match what it was originally, Cub Cadet white. Yellow, Green and Red we some of the other colors. You can guess those tractor brands. I have JD yellow in a few rattle cans too.

After getting all the rust and corrosion off all the pieces, it was hand painted white primer. Even in places where Brinly didn't in the bolt holes.
Then 2 finish coats of white with the air-gun. I let the each finish coat sun bake for 2 full days in 80F+. This allows the finish coat to bond well with the primer and to fill in the hand painted brush strokes. The original Brinly white lead based paint is mostly gone now from those years ago.

For adding the wheels, I'm open to suggestions please. The parts manual looks close in the bigger one. The smaller one he V-bars looks like my model. Also, my brother lost items 8, 13, 20 & 18. Item 13 is a very long carriage bolt. Item 8 is a plate with a hole, I do not know it's dimensions.

1716648801009.png
 
Last edited:
6.5hrs later and it's done. :oops:

Watching paint dry takes a long time. :D

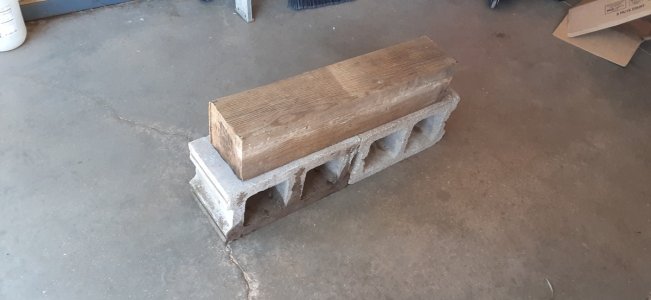
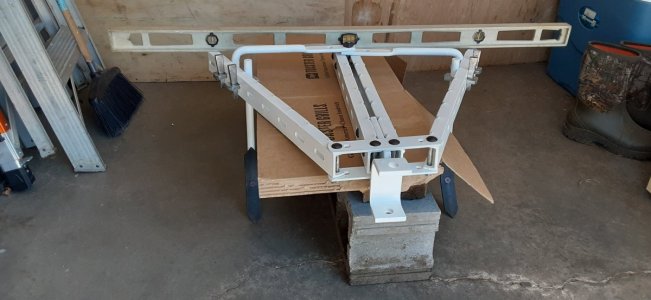
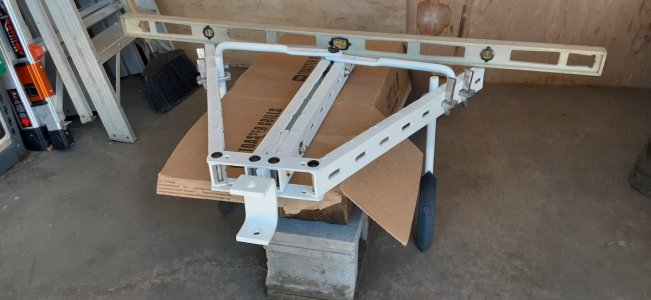
How to set all the rippers/shovels at the same height. Tape measure will not even be close and too complicated. Better to build a calculated height fixture. 2X cinder blocks and one 6x6 left-over deck support.
20240525_122516.jpg

Got to keep it level.

20240525_123407.jpg

Leveled side-to-side,

20240525_123415.jpg

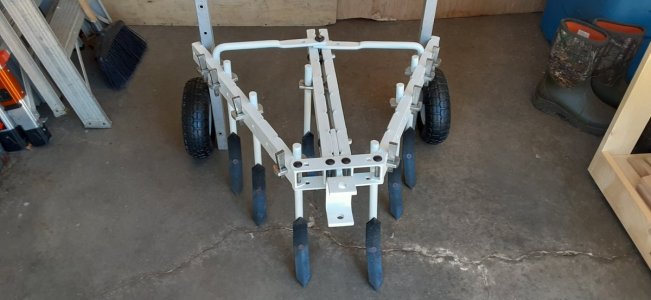
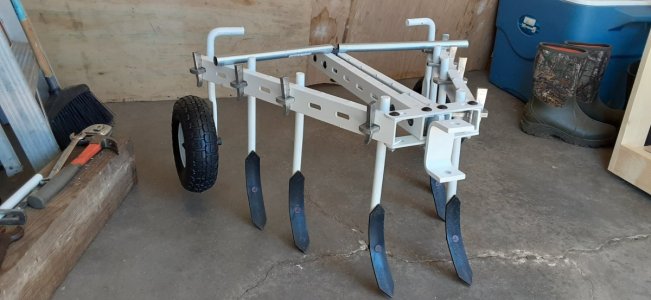
How to add the wheels. Brain puff after brain puff applied with what I had,

20240525_140248.jpg

That didn't work, try this, yet, those were on the top. Add something to the top too,

20240525_144101.jpg

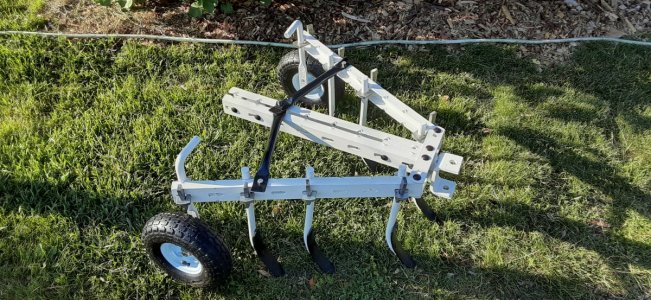
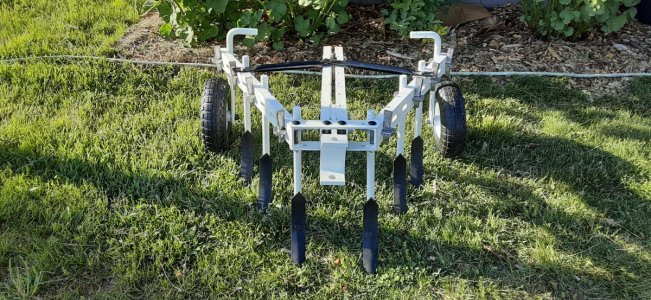
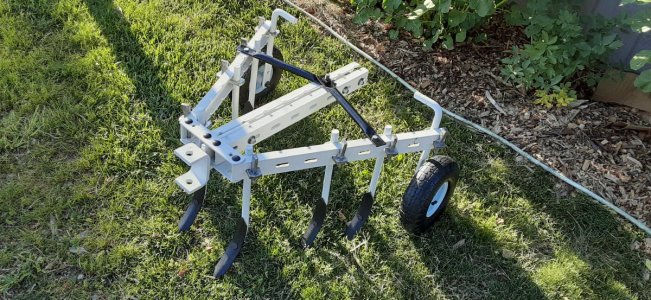
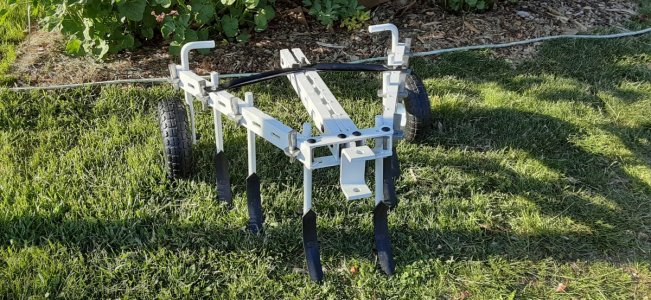
Completed,

20240525_182145.jpg

20240525_182203.jpg

20240525_182225.jpg

I had to ensure the wheels were placed at the same level as the bolt-n-nut on the ripper/shovel. This way, when this is pulled along the ripper/shovels all do their job perfectly.
 
Back
Top